When switching your commercial vehicle to a new oil type, such as CNG 15W-40 diesel engine oil, an engine flush becomes an essential step. This ensures the engine is clean and prepared to receive the new oil effectively. Without a proper flush, old deposits and residues may negatively impact the performance of the new oil and your vehicle as a whole.
This guide walks you through the flushing process in simple steps. It’s perfect for operators and fleet managers handling trucks, buses, or other heavy-duty commercial diesel vehicles.
Why an Engine Flush is Necessary Before Switching Oils
Old engine oil doesn’t just drain out cleanly. It often leaves behind:
- Soot
- Sludge
- Metal particles
- Carbon build-up
- Leftover additives from previous oils
These remnants can negatively interact with the new oil, especially with CNG 15W-40 diesel engine oil, which is formulated for cleaner burning CNG engines. To get the most from the new oil, the engine must be free from old oil remnants that could interfere with its performance.
When to Flush Your Engine
An engine flush is not needed before every oil change, but here are situations where it’s particularly helpful:
- Switching from mineral to synthetic oil
- Transitioning from regular diesel oil to a gas-compatible oil
- When the engine has high mileage or shows signs of sludge
- If you notice irregular performance or oil pressure
- When the vehicle has had irregular oil maintenance
In these cases, a flush ensures the engine’s internal surfaces are clean and ready for the new oil.
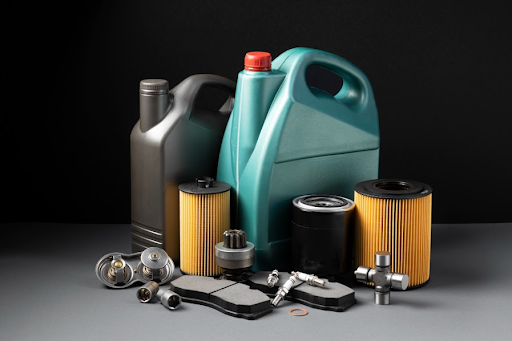
Gather Everything You Need
Before starting, gather these essential items:
- Engine flush solution (designed for diesel engines)
- New oil filter
- Drain pan
- Funnel
- Wrenches and gloves
- New oil – in this case, CNG 15W-40 diesel engine oil
- Clean rags
Ensure you’re working in a well-ventilated area. Let the engine cool down slightly, but not completely cold.
Step 1: Begin with a Partial Warm-Up
- Start the engine.
- Let it run for 5 to 7 minutes.
- This warms the oil and loosens up the deposits inside.
- Turn the engine off before moving to the next step.
Warmed oil flows better and helps carry more dirt when drained.
Step 2: Add the Engine Flush Solution
- Open the oil cap.
- Pour in the recommended amount of flush solution.
- Close the cap and start the engine again.
- Let it idle for 10 to 15 minutes (don’t rev or load the engine).
The flush solution mixes with the old oil, softening built-up deposits and circulating through all key engine parts like the crankcase, camshaft, and lifters.
Step 3: Drain the Old Oil Completely
- Turn off the engine and let it rest for a few minutes.
- Position your drain pan under the sump.
- Open the oil drain plug with a wrench.
- Let all the oil and flush solution drain out completely. Be patient and wait until the last few drops fall.
- Wipe the plug and reinstall it securely.
Proper drainage ensures no contaminants are left behind and the system is fully reset.
Step 4: Replace the Oil Filter
- Use a wrench to remove the old oil filter.
- Wipe the filter mount with a clean rag.
- Apply a light coat of new oil to the gasket of the new filter.
- Screw the new filter on by hand until it’s snug.
A fresh filter ensures that old dirt doesn’t mix with the new oil.
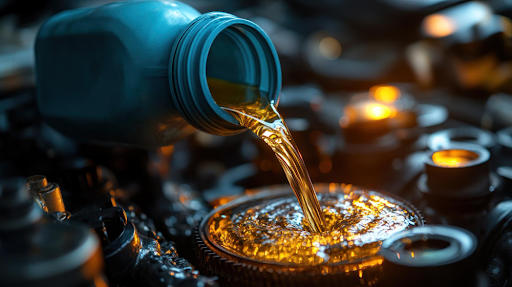
Step 5: Add the New Oil Carefully
- Remove the oil filler cap.
- Insert a funnel and slowly pour in CNG 15W-40 diesel engine oil.
- Add the recommended quantity for your vehicle.
- Check the dipstick to confirm the oil level is correct.
- Close the cap tightly.
The engine now has fresh, clean oil that can start doing its job right away.
Step 6: Run the Engine and Check
- Start the engine.
- Let it idle for 5 minutes.
- Check for any leaks around the oil plug and filter.
- Watch the oil pressure gauge.
- Turn off the engine and wait for 2 minutes.
- Check the dipstick again and top up if needed.
This step confirms that the flush and oil change were successful and everything is working smoothly.
Step 7: Monitor Performance Over the Next Week
Track the following over the next few days to ensure everything is functioning optimally:
- Engine noise and smoothness
- Temperature changes
- Oil pressure behavior
- Oil level regularly
- Fuel efficiency improvements
These signs will tell you whether the flush and oil change were successful. A noticeable improvement in engine response is a common result.
Final Checks That Make a Difference
Before you consider the job complete, remember these final steps:
- Dispose of old oil and filters safely.
- Record the date and oil type used.
- Keep a close watch for unusual sounds or warning lights.
- Plan your next oil change based on the new oil schedule.
Clean oil in a flushed engine supports longevity and better power delivery.
Maintenance Habits that Build Engine Life
Engine flushing isn’t something that needs to be done regularly. However, when switching to a high-performance oil like CNG 15W-40 diesel engine oil, it’s a wise decision. It clears the path for the new oil to perform at its best without interference from old contaminants.
Operators who follow proper maintenance routines often enjoy better fuel economy, fewer breakdowns, and longer engine life.
Tata Motors Genuine Oil offers reliable solutions tailored for heavy-duty engines. With proper care and the right oil, your engines can remain efficient and strong, even under the toughest conditions.